|
Parallel Port LCD Cheap & Easy
-- Page 5
Page 1
2
3
4
5
6
Time to power/test
After you checked and rechecked all your wiring. It's time to test your LCD. First turn off your computer.
Before connecting power you have to know your computers power supplys voltage outputs. In your computer locate a unused power supply (molex) connector.
The same kind that plugs into the back of you hard drives and CD-ROMs. There are 4 wires in that connector. 2 black, 1 red, and 1 yellow.
Connect your LCD's power (+5V) wire(s) to the red wire in the molex connector. Connect your LCD ground wire(s) to
the black wire in the molex connector next to the red wire. Connect the parallel cable to your port.

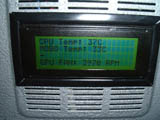
Now turn on your computer. This is the startup initialize screen. You may have to adjust contrast and brightness on your pot's.

Since this is my article and I know my LCD works with the software I decided to tell
you how to mount the LCD. I know your excited to see the software running your LCD. You may want to skip
ahead to the software introduction and come back to this later.
I used my dremel to cut a hole in the side of the case where I decide to mount the dremel. For more
info on case cutting check out the article on cutting fan blow holes.
I cut the hole about a quarter inch bigger then the lcd face and
wrapped the sharp edges with black car door edge molding that can be
bought at a auto parts store. Actually I cut the hole size so good
that I didn't need anything to hold the LCD in the hole. It's just
pressure fitted.


All Rights Reserved. 2001 Design by Disco.
| 
